

How to Add a Calendar Link to your Email Signature to Schedule Appointments
How to publish your Outlook Calendar step-by-step
Step 1: Open your Office.com, click “Apps” on the left, and then select your Outlook calendar.
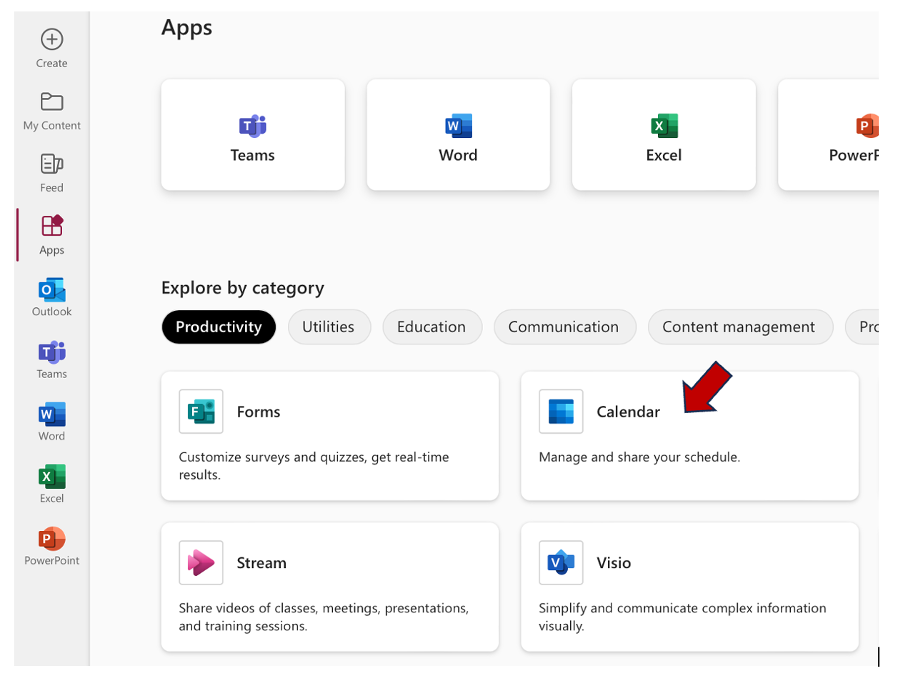
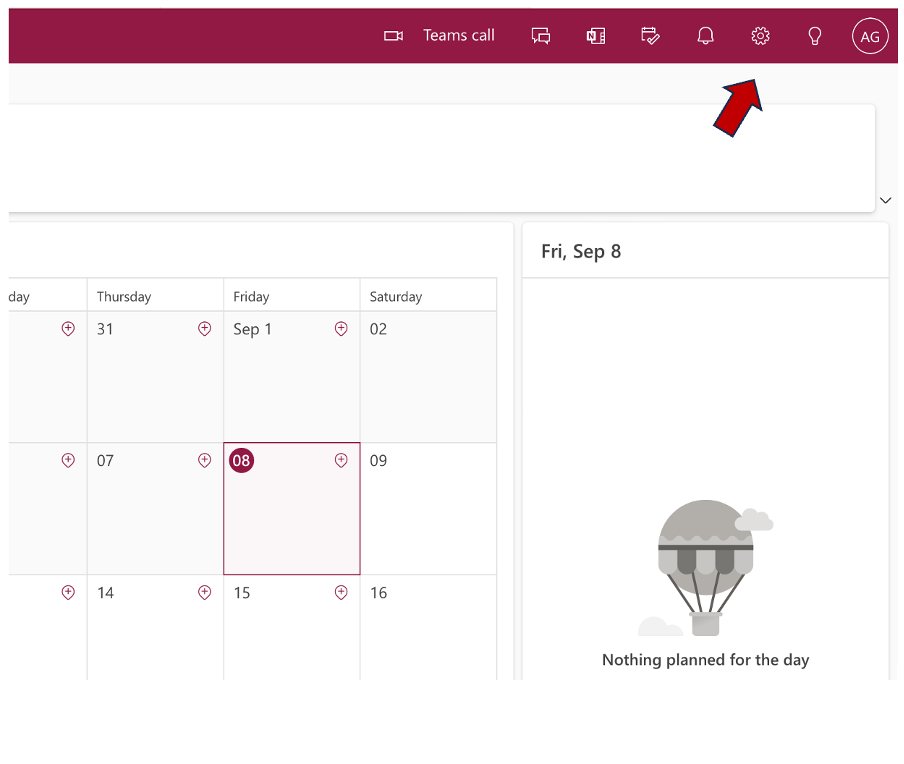
**Step 2:**In the upper-right corner you’ll find the “Gear Icon”. Select it and scroll down until “View all Outlook Settings”.
**Step 3:**In the pop-up window “Settings”, click “Calendar” on the left and then “Shared Calendar”.
**Step 4:**Now you can select “Publish a Calendar” and select the according one.
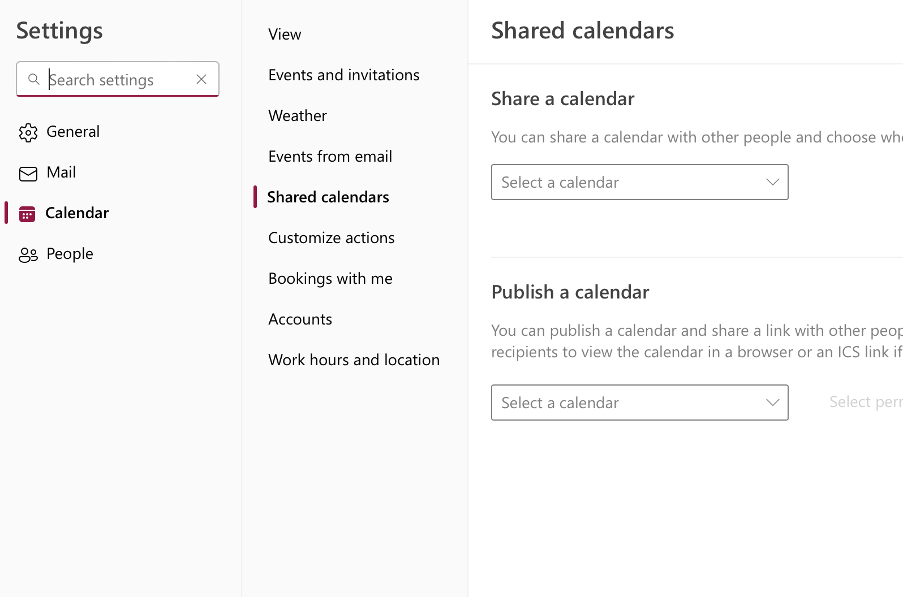
**Step 5:**You can now add permissions as desired and, finally, click “Publish”.
How to Add the Calendar Link to your Email Signature step-by-step
Now that you created a link to your Outlook calendar, you can add it to your signature. This way, others can easily see when you’ll be available and propose an appointment.
**Step 1:**Open your Outlook and click “File” and then “Options”.
**Step 2:**Select “Mail” and then “Signature”.
If you’ll need a more detailed description about adding signatures to your Outlook, click here.
Do you have questions? Feel free to leave a comment in the comment section.
See you soon!
Aline & the Lookeen team